
I love spicy foods. Love. Love. Love.
Those hot carrots I grew up devouring from taquerias and Mexican joints have become kind of a staple in my fridge after finding a great recipe and started making them myself (the other recipes I’ve tried were a bit too sweet for my tastes). They definitely add some ZING alongside a sandwich or tacos. Sometimes, I’ll just eat ’em a la carte. Potato chips ain’t got nuthin’ on some fiery carrots.
Here’s the thing: I always assumed that the vinegary pickled carrots I made at home were a product of fermentation. Wrong! Pickling and fermenting foods are not the same thing. (See? We’re all still learning as we go along.) There’s no vinegar in fermented ones — they’re just soaked in a brine for a handful of days and microbes give them their tanginess through lactic acid fermentation.
I thought I’d do a side-by-side comparison by making my standard pickled spicy carrots and trying a new fermented spicy carrots recipe that I’d found and see how they differed in taste.
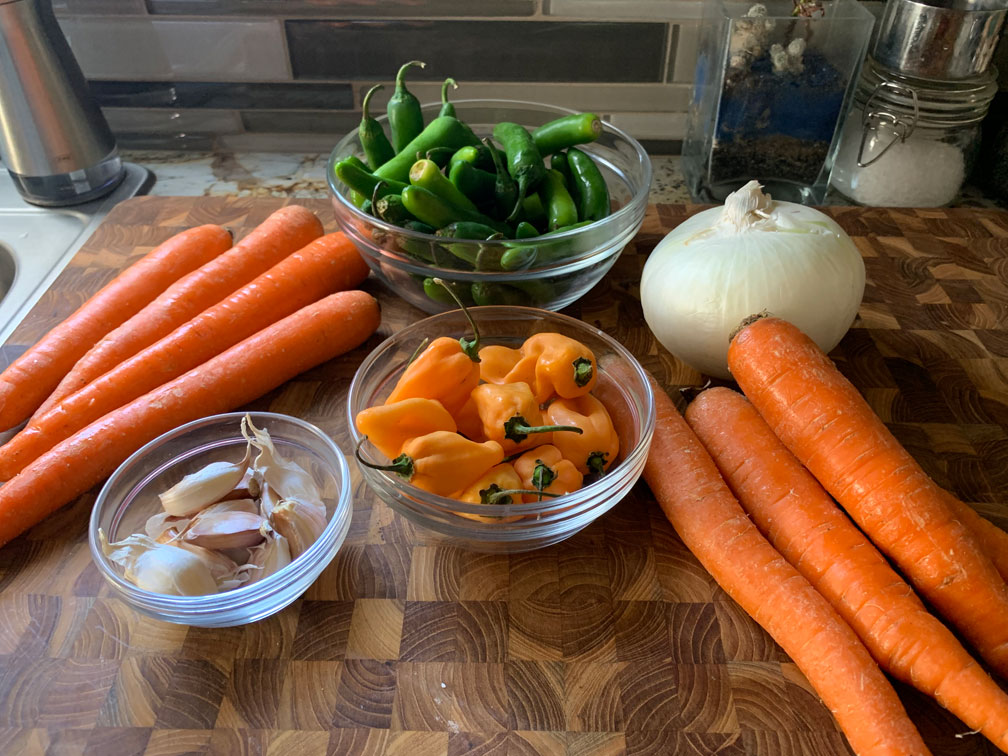
Both recipes called for 2 – 2 1/2 lbs of carrots, but I thought having 5 lbs of hot carrots might be a little much (not to mention that I would have run out of jars to store them). I cut that down to about a pound for each — four medium-sized carrots.
Both recipes also suggested using two jalapenos. Two? I mean, come on. I upped the ante a bit to ten serrano chiles and five habaneros for each batch to make them just a wee bit more autobahn-speed caliente.
Added to that, half of a sliced onion and six slightly-crushed garlic cloves.
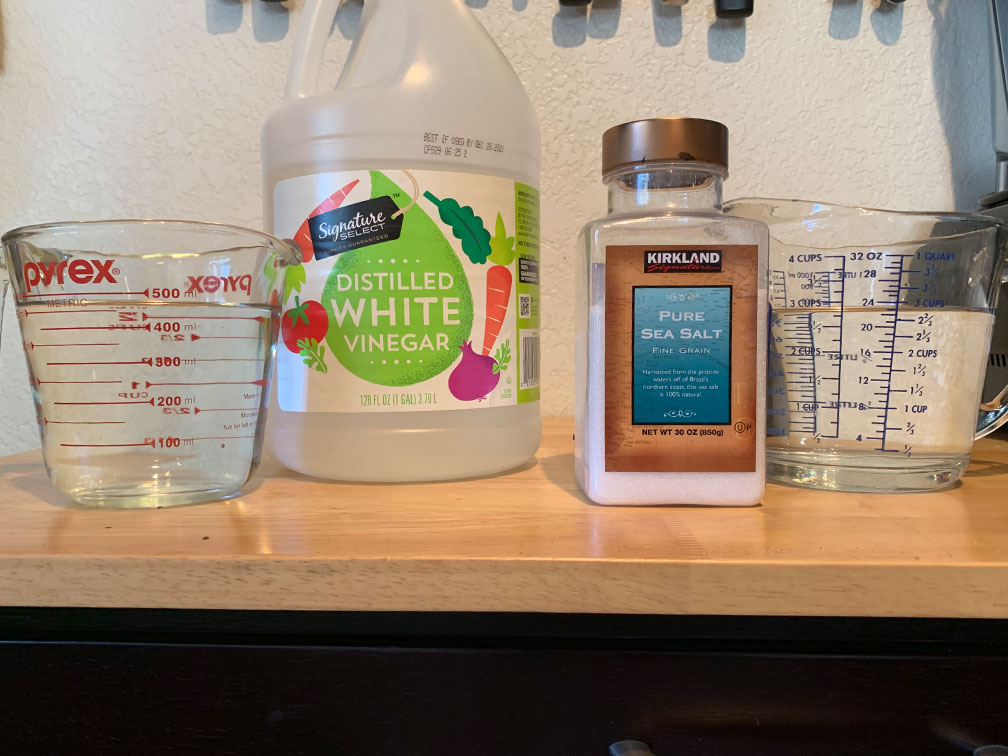
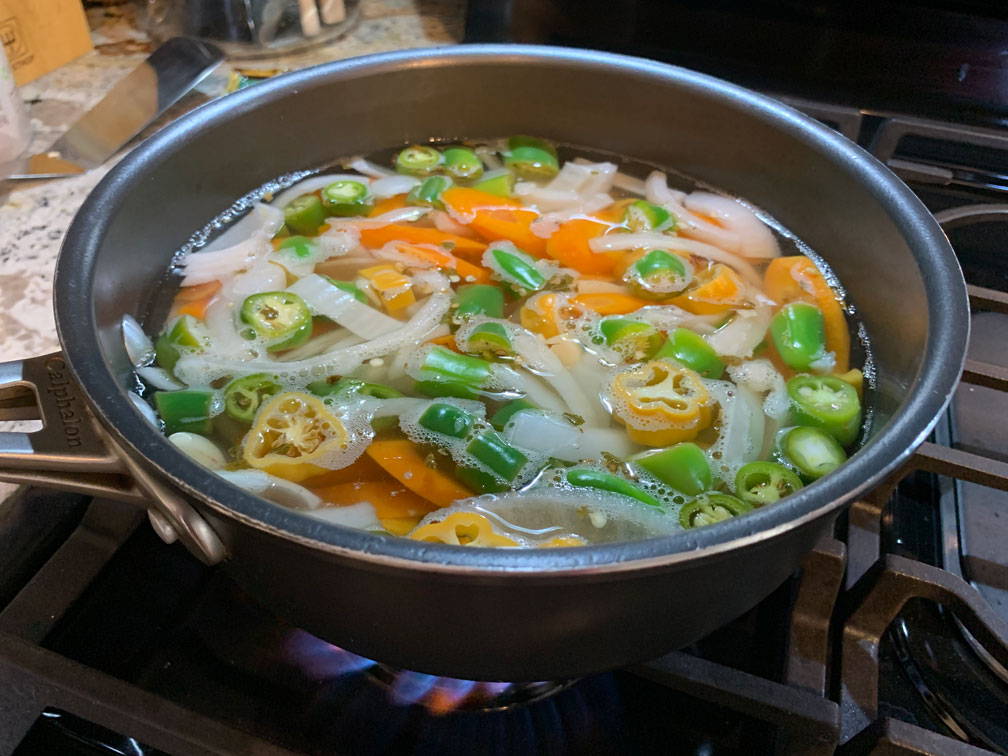
For the pickled batch, I mixed equal parts of water with white vinegar; about two cups total. (I actually ended up needing another cup later when I realized there wasn’t enough to cover all the veggies in the par-boiling part coming up.)
The fermented batch gets soaked in a saltwater brine: I heated up one cup of water and dissolved a tablespoon of sea salt in it, then added two more cups of water and let it cool.
Chop, chop, chop.
Like fool, I usually don’t wear gloves when chopping up chiles. And usually end up regretting it when I go to wipe something out of my eye later.
Me: “Why does that sting so much? Oh… yeah. Duh.”
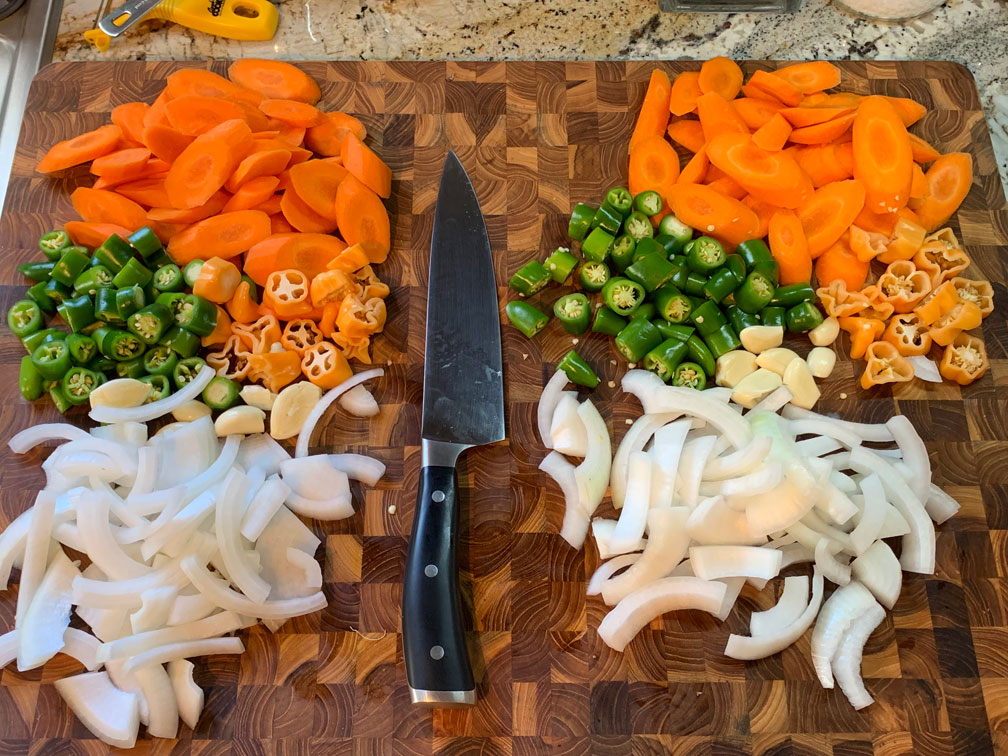
The pickled batch was par-boiled for about 10 minutes in the vinegar solution along with a few bay leaves, a handful of (5-10) peppercorns, a little pinch of Mexican oregano, a hefty pinch of Kosher salt and a dollop of olive oil.
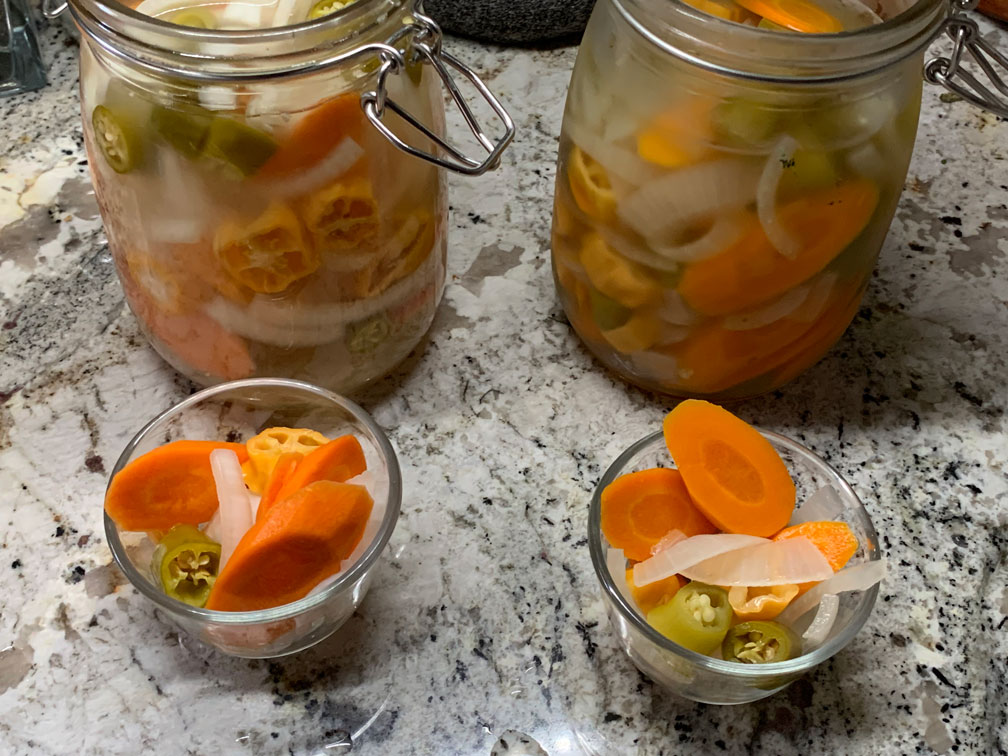
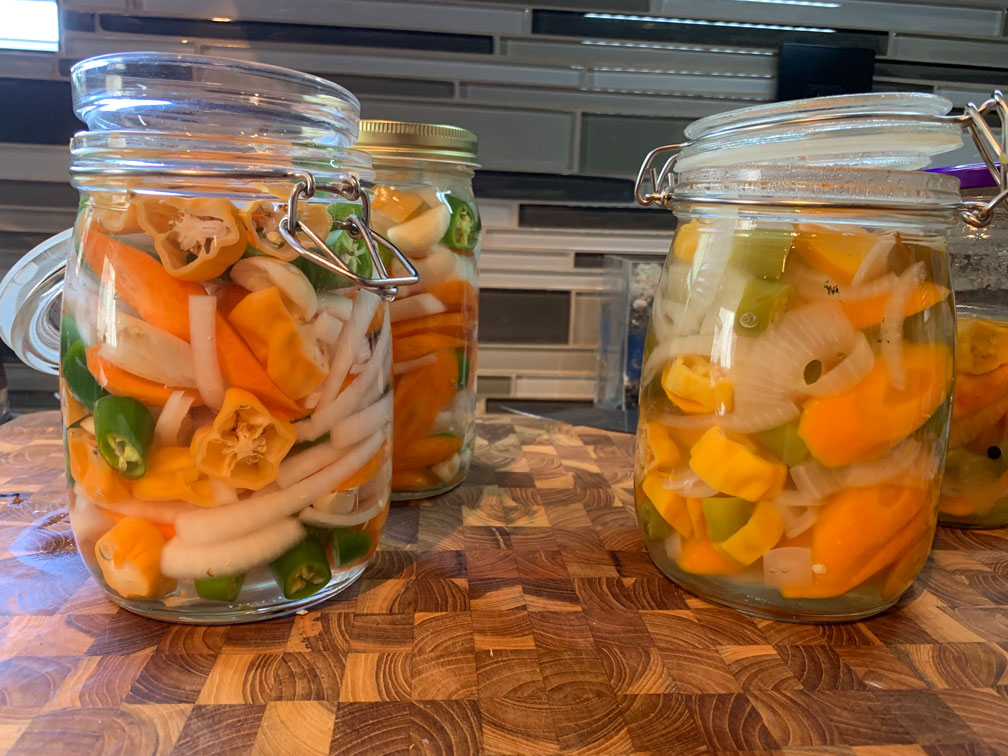
Once everything cooled down, I put the fermented batch of veggies in a jar and covered them with the brine (left side). The chiles liked to float and they need to be completely submerged, so I put a little glass bowl on top to push everything under the brine. (You’ll see I ended up with extra even after cutting back on the carrots.) Those jars went into the dark pantry on a baking pan just in case the fermentation causes some overflow.
The cooled-off pickled mixture also went in a jar, covered by the vinegar solution (right side) and put right into the fridge. The recipe says it’s best to give them a couple days to really get flavorful, but I think they taste great right away.
So, what’s the science behind lactic acid fermentation? I’ll start out by saying it’s different from alcohol fermentation (which produces, of course… alcohol. The boozy spicy carrots might be another project. <wink> ). Both, however, are anaerobic metabolic processes which means oxygen is not needed. In short, microbes “eat” the sugar in the carrots and other veggies and convert the sugars in them, through a series of steps, into lactic acid which give the food part we eat its tangy flavor. The in-between steps take place in two “sets” of reactions: 1) glycolysis, and 2) lactic acid fermentation. Let’s check out glycolysis first:
1) Glycolysis overall reaction: Glucose ( + 2 ADP + 2 NAD+ ) → Pyruvic acid ( + 2 ATP + 2 NADH )
This “simplified” version of the reaction actually has 9 separate reactions that involve 10 different enzymes that help along at each step. In an upper-division biochemistry class, you’d be required to know every single intermediate product; maybe even the names of the enzymes. (I had them all memorized at one point… until the class ended and I quickly decided to free up those neural synapses. If you’re curious, you can check out the nitty-gritty steps here.) In a general biology class, we’d stop at the formula above and jump to fermentation in part two. For the purposes of an introductory microbiology class, though, you would probably at least be expected to know that there are two “phases” to glycolysis: A) the preparatory (or investment) phase, and B) the payoff phase.
1A) Glycolysis preparatory (investment) phase: this is the part that literally splits glucose (a 6-carbon molecule) into two 3-carbon molecules and “costs” the cell 2 ATP molecules. But, as the old saying goes, you have to spend money (or ATP in this case) to make money. Here’s the overall reaction that gets the molecules ready for the payoff phase:
Glucose + 2 ATP → 2 G3P (aka glyceraldehyde 3-phosphate)
1B) Glycolysis payoff phase: as the name implies, this is the part where the cell “cashes in” to earn some ATP from all the work done during the preparatory phase. Here’s how this part plays out:
2 G3P + 4 ADP + 2 NAD+ → 2 Pyruvic acid + 4 ATP + 2 NADH
So, overall, two ATP’s were originally “invested”, but four were cashed out at the end. End result: 2 ATP’s earned by the cell. Cha-ching!
But there’s still the question of those NADH’s. In order for glycolysis to keep going, they need to be recycled back to NAD+. And THAT is where the fermentation comes in.
I can feel you glossing over. We’ll get back to carrots in a sec, but there’s one final and important step to get those carrots where I want them — nice and tangy.
2) Lactic acid fermentation: To recycle the NADH molecules and keep glycolysis going, one more step (and one more enzyme) takes the ‘H’ from NADH, crams it back onto the pyruvic acid molecule which converts it to lactic acid, like this:
2 Pyruvic acid + 2 NADH → 2 Lactic acid + 2 NAD+
And voila! The NAD+ molecules are ready to circle back up to step 1B and keep the ATP coming for the cell. Plus, the lactic acid created gives the carrots a bitter / tangy flavor and everyone is happy. Especially me.
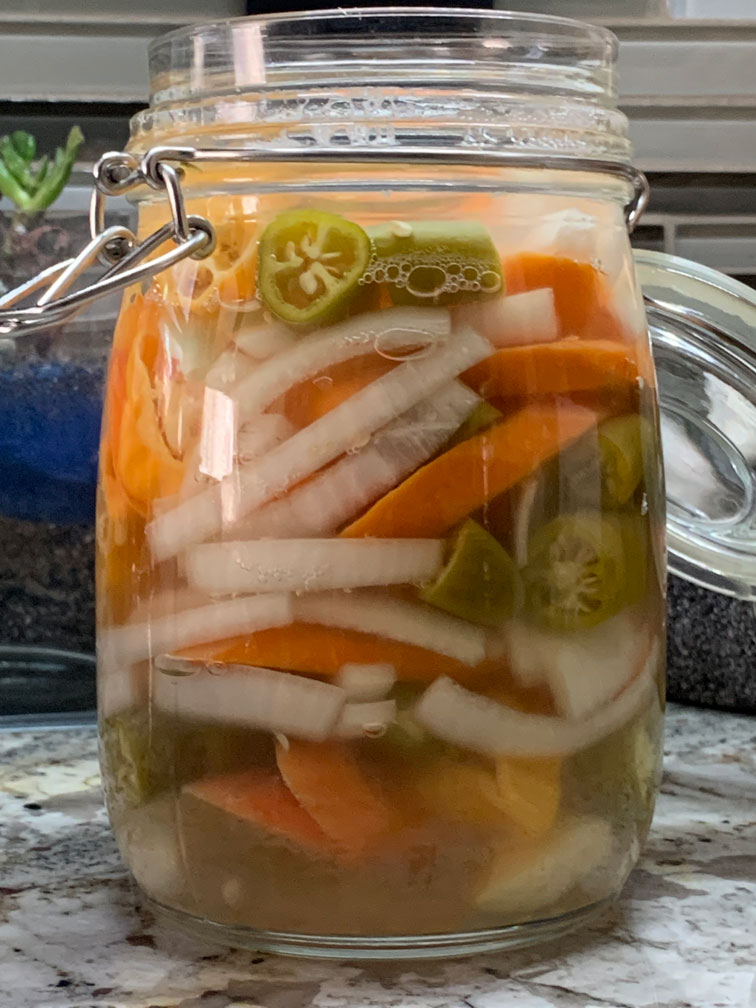
Okay, back to carrots. Four days later, here’s how the fermented batch was looking. I was skeptical about leaving raw food out at room temperature for days at a time, because that’s not something I would normally do… and then be expected to put it in my mouth.
Good signs I was told to look for were a “cloudiness” in the liquid (cloudiness: check!), bubbles near the surface (bubbles: check!), and a “pleasant vinegary smell” when opened (vinegary: check!). Things to look out for in a batch gone wrong were a “funky” or “rotten” smell, and black or pink mold growing on the surface. That much seemed kind of like a no-brainer.
Time to taste! On the left: fermented carrots. Which leaves the “traditional” pickled carrots on the right.
Both looked great; bright and inviting (if the chiles don’t scare you off.) Both were crunchy, although the fermented ones did have a bit more ‘snap’ to them. Both were EN FUEGO spicy!!! To be honest, I’ll probably try to bump them up a few more spicy notches next time, but these are definitely not the ones you’d want to bring to your aunt’s dinner party without having people sign a waiver. (Pero a la fiesta de su tía, pienso que no es una problema. [jaja] )
The ‘tangy’ of the fermented ones was really… “different” from what I’m used to. Bitter, but without the kind of expected bitterness you get from carrots soaked in vinegar which has that really obvious, acidic edge to it. I’m going to let the fermented ones go for a couple days and see how far that tanginess can get pushed before putting them in the fridge to slow / stop the fermentation process.
So, here’s what I think so far: the mess involved with cooking either batch was more or less the same. The fermented batch took some more work in making sure they weren’t exposed to air (like… very little extra work. But if they are contaminated it’s a potential disaster — don’t eat the pink moldy carrots, please!) With the pickled batch, there’s an extra step of par-boiling, but 10 minutes is nothing to gripe about.
Fermenting takes some patience, so if you’re throwing a Cinco de Mayo party, then you’ll need to plan ahead for that sort (of course, they do keep in the fridge for at least 3 months). On the other hand, brewing up some vinegary pickled carrots can easily be done in an hour or less. As for taste, honestly, I’m still undecided. If anything solid comes up after letting the fermenters sit a few more days, I’ll make sure to update the post.